STEP 1 — Choose the Best Shot Types to Tell Your Story
Refer back to the shot types that you learned about in the 3 FloobyNooby blog posts: The Cinematography of The Incredibles Part I (Links to an external site.) Part II (Links to an external site.) and Part III (Links to an external site.)
Shot types…
Camera Angles…
- Straight On
- Up Shot
- Down Shot
- Bird’s Eye
- Worm’s Eye
- Over the Shoulder
- Point of View
Camera Movement
(reference here with example videos: https://blog.storyblocks.com/video-tutorials/7-basic-camera-movements/):
Camera base is stationary…
- ZOOM…Without a doubt, zooming is the most used (and therefore, most overused) camera movement there is. It is often used as a clutch when the videographer is not sure what else to do to add interest to a shot. If you are going to use zoom, try to use it creatively. Zoom in or out from an unexpected, yet important, object or person in your shot. Use a quick zoom to add energy to a fast-paced piece. Don’t get stuck with your zoom as your default move!
- PAN… Panning is when you move your camera lens horizontally; either left to right or right to left, while its base is fixed on a certain point. You are not moving the position of the camera itself, just the direction it faces. These types of shots are great for establishing a sense of location within your story.
- TILT….Tilting is when you move the camera lens vertically, up to down or down to up, while its base is fixed on a certain point. Again, like panning, this move typically involves the use of a tripod where the camera is stationary but you move the angle it points to. These shots are popular when introducing a character, especially one of grandeur, in a movie.
- RACK FOCUS… Ok, rack focus is not as much of a camera move as it is a technique, but many beginners overlook this essential skill. You adjust the lens to start an image blurry and then shift the focus to make it crisper, or vice versa. It is an extremely effective way for you to change your audience’s focus from one subject to another.
Camera base moves through space…
- DOLLY... A dolly is when you move the entire camera forwards and backwards, typically on some sort of track or motorized vehicle. This type of movement can create beautiful, flowing effects when done correctly. If you want to attempt a dolly, make sure your track is stable and will allow for fluid movement.
- TRUCK… Trucking is the same as dollying, only you are moving the camera from left to right instead of in and out. Again, it is best to do this using a fluid motion track that will eliminate any jerking or friction.
- PEDESTAL… A pedestal is when you move the camera vertically up or down while it is fixated in one location. This term came from the use of studio cameras when the operators would have to adjust the pedestal the camera sat on to compensate for the height of the subject. A pedestal move is easy to do when the camera is fixated to an adjustable tripod.
Shot Framing…
- Rule of thirds – use the “hotspots”
- Consider the layers of things in foreground, middle, and background to add depth and frame the subject
- Use lines and shapes that lead the eye towards the subject of interest
STEP 2…Create the Storyboard
First, Download the Storyboard Photoshop template: 4-Page Storyboard Template
Open the file in Photoshop. The first Page has sample content loaded that you will want to hide. Click the eyeball icon on the layers that say “example_hide” to hide them OR just scroll to Page 2 and keep Page 1 with the examples showing as a reference.

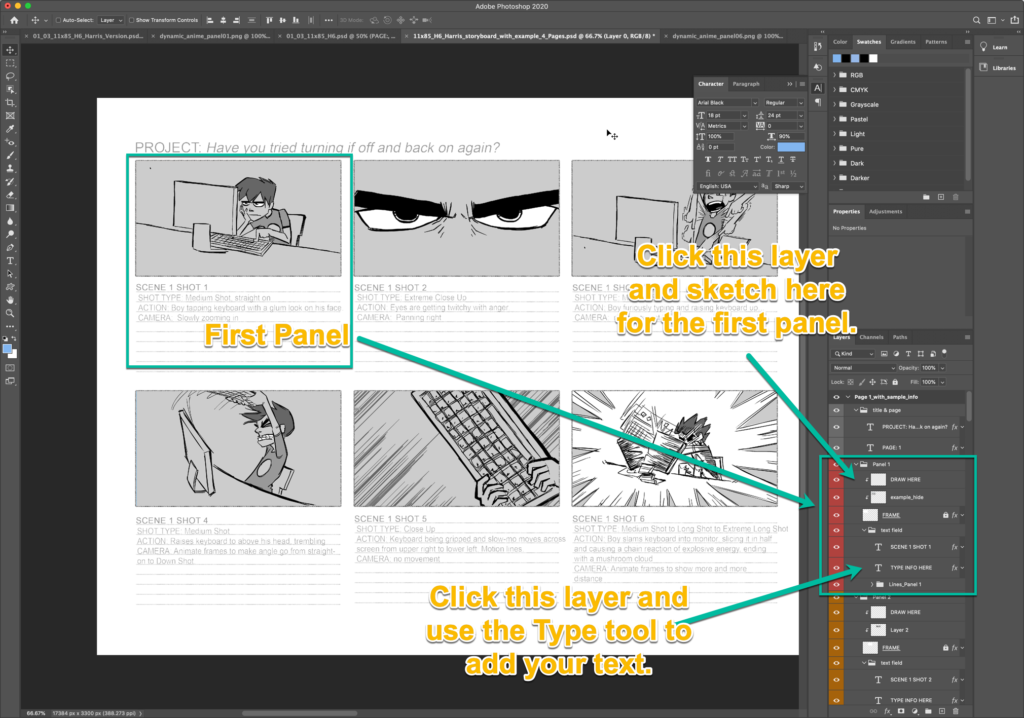
Now, for each panel, add the text to the template and draw a sketch for each time your shot will change.
Use a mid-tone gray for your sketches. You will be putting these into your Animate CC “sketch” layer and will be drawing on top of them to create the Line Work layer.
When finished, export a PNG or JPG file of each page of your Storyboard and post it in your ArtStation portfolio project.
Why Use Gray? Can I use Black or Full Color? Using Gray to do your sketches will make it easier to do the Line Work using black in Animate CC on top of it.
Or you can do it in Black or Full Color now and then do this to create a version that is lighter in color for importing into Animate CC:
- Make a duplicate copy of the storyboard file by doing a “Save As” and naming it something different.
- Click on a “DRAW HERE” sketch layer and then click the Lock Pixels icon (looks like a checkerboard) near the top of the PS Layers panel.
- Then choose a large light blue brush and “paint” over the whole panel — since you have the Lock Pixels on, you will only be able to paint on areas that were previously sketched on — they will take on the new bright blue color.
STEP 3…Create the Animatic using the Storyboard
Open up your Storyboard in Photoshop. If you made a light blue version, then that’s the one you need, or if you made your sketches in a midtone gray, you can use that file.
Make a screenshot of EACH PANEL from your Storyboard. Save them with a name like storyboard_panel_01.png in a folder in your project folder. Putting a number in the file name will help you with a later step in a bit.
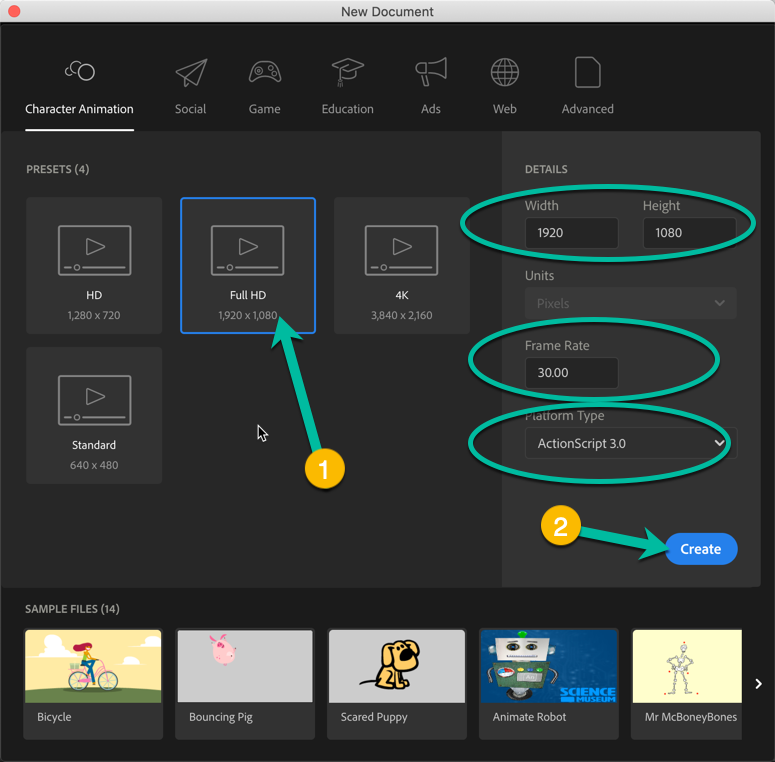
Create a new document in Animate CC with a width of 1920 and a height of 1080.
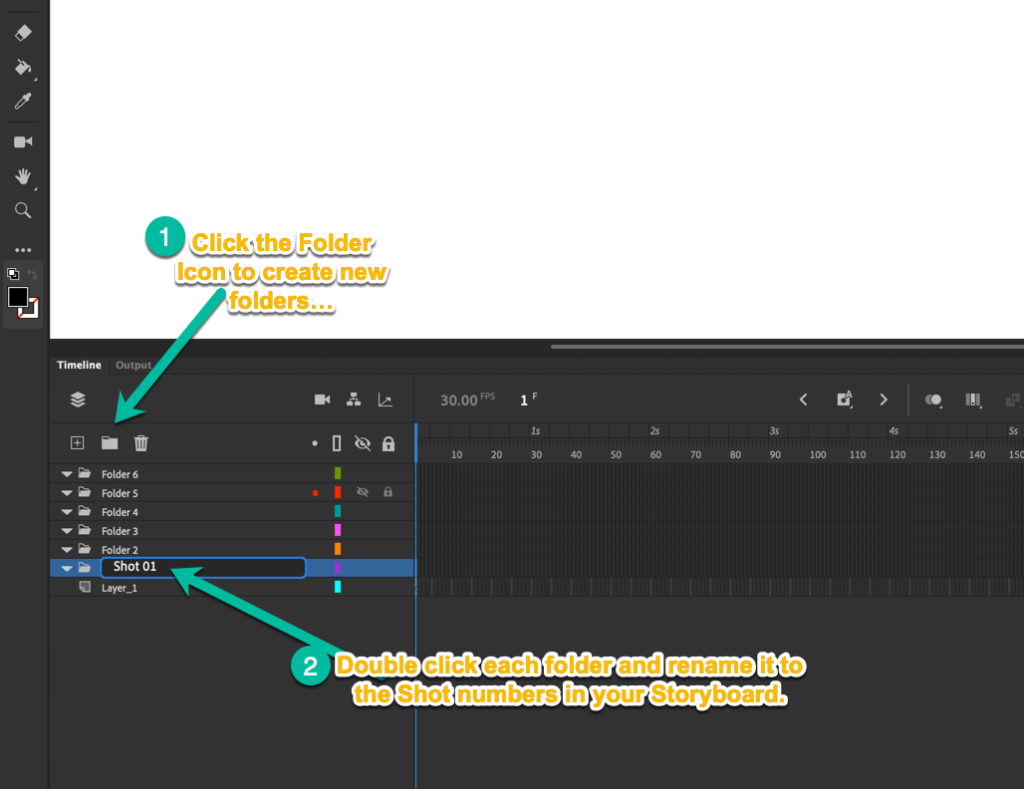
In Animate CC, go to the Layers panel and add a folder for each shot in your storyboard. All you need to do is click on the Folder icon and a numbered folder will appear in your Layers panel… Then, double-click the folder names and change them to Shot 01, Shot 02, etc.
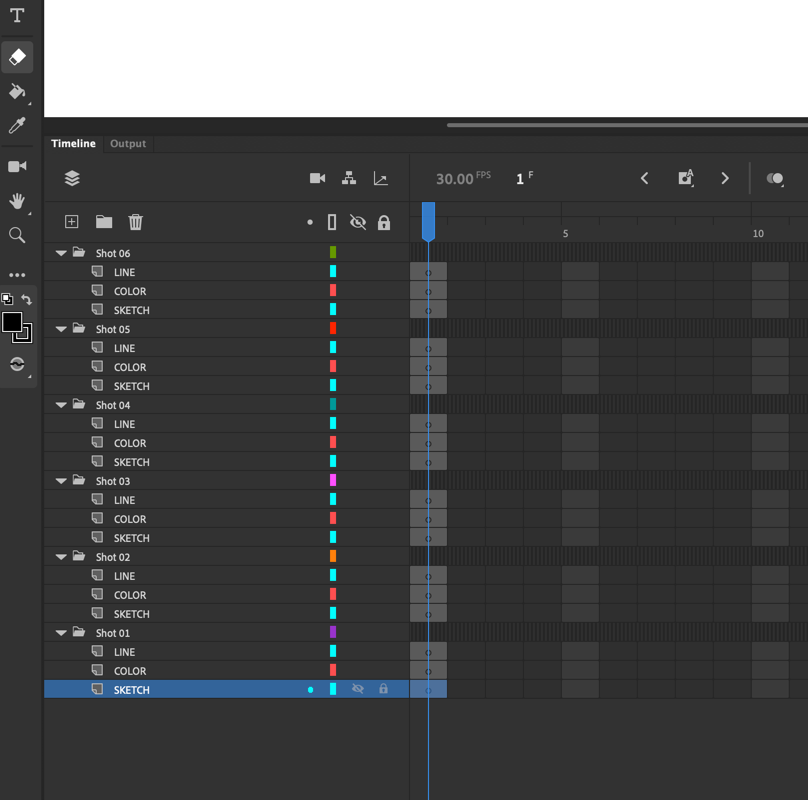
Next, create some layers for each folder. You should add the following layers and you may be adding more as you go if you think it makes sense to do so… See screen capture for starting layer names…
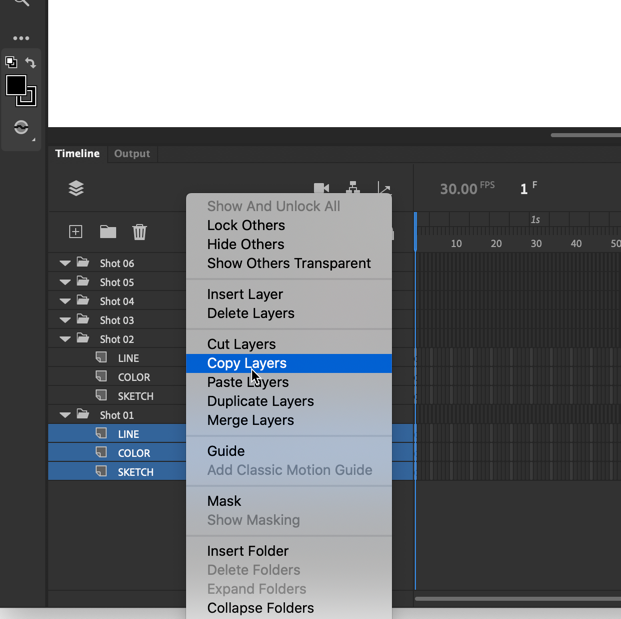
Once you create the first set under Shot 01, you can highlight them all and then right-click and choose “copy” and then click on Shot 02 and right-click and choose “paste”.
When you finish, it will look like this…
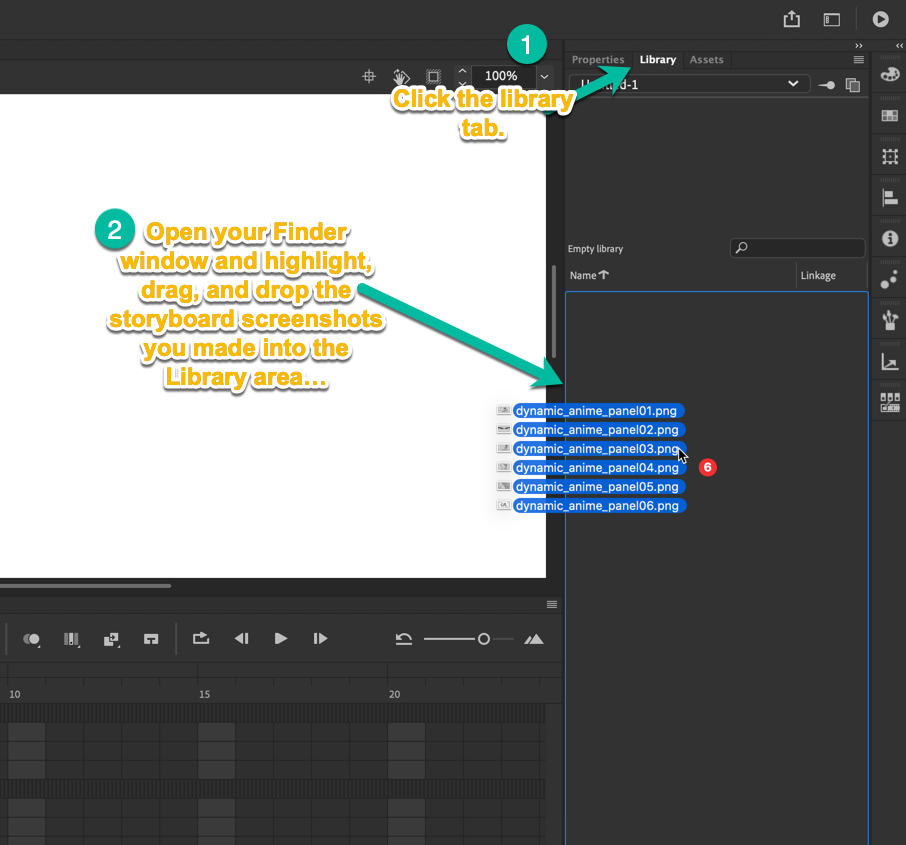
Now, it’s time to pop in your Storyboard images into the sketch layer for every Shot.
Now that you’ve got the images in your Library, you can drag each one into the first frame of the shot that it goes with…
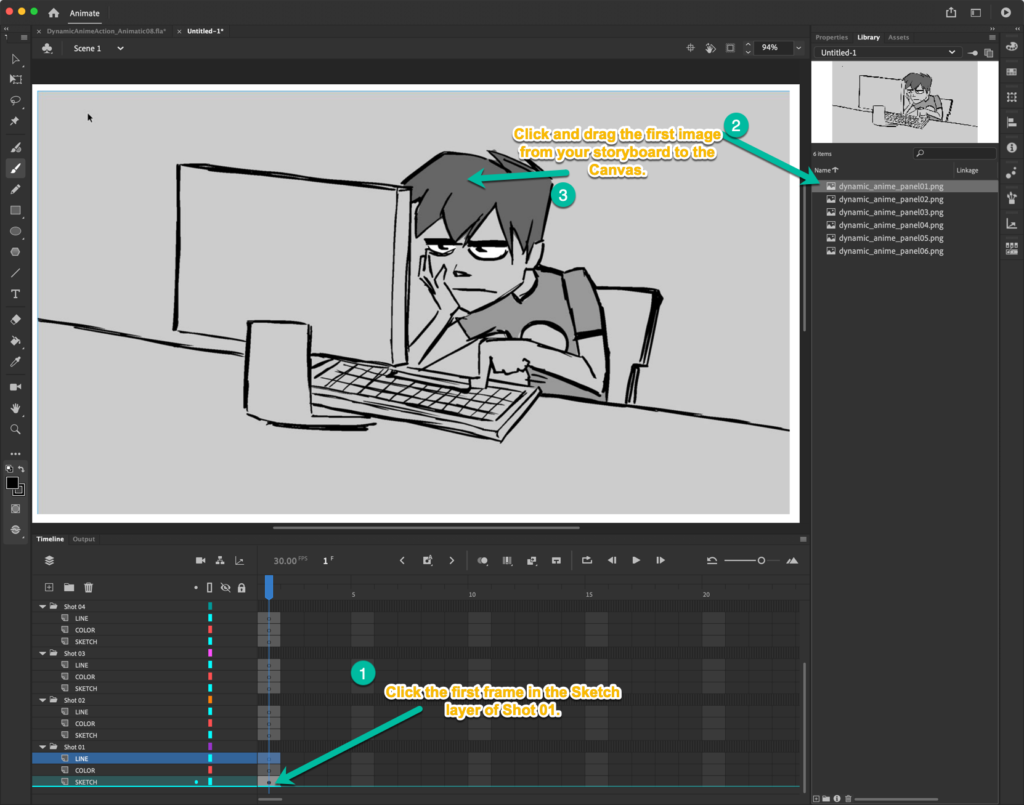
Do that for each Shot.
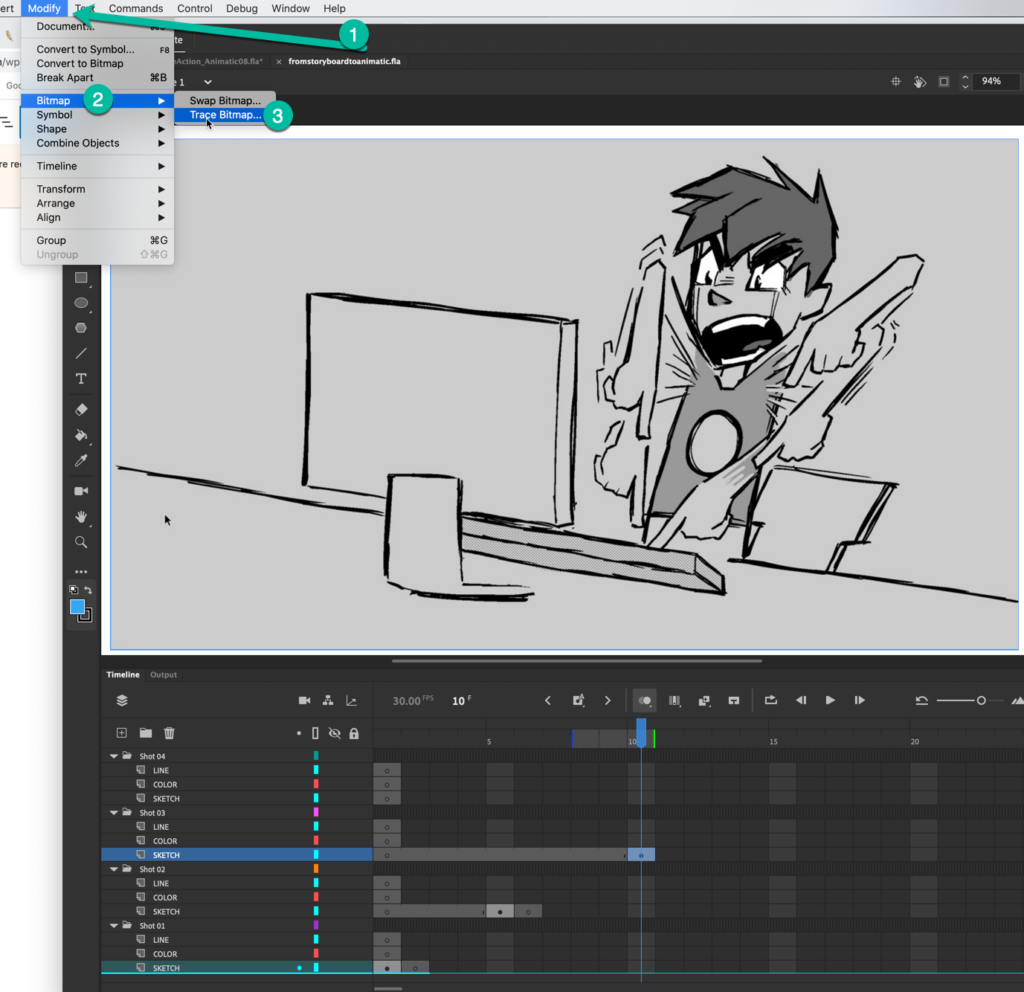
Now, click on each of these and do the following process to make it so that you can select individual parts of these images, which will help you as you work to fill in the frames of the Sketch Layer:
Click Modify, Bitmap, Trace Image, OK as shown below…
Do a “Save As” to make a copy of the file for the Animatic. This allows you to keep a copy for actually getting started on your First Draft of the animation.
An Animatic just keeps the same image on the screen for the length of time that you anticipate that shot taking when finished. So, to create an Animatic, you will copy the frame across for the number of seconds you think the shot will take.
Then, Export the animatic to video, publish on Vimeo, and post to your ArtStation project.
STEP 4…Getting Started on the Animation
At the beginning of each planned Shot, you have a sketch in that first frame. Now, you want to create the animation across the entire sketch layer for each shot.
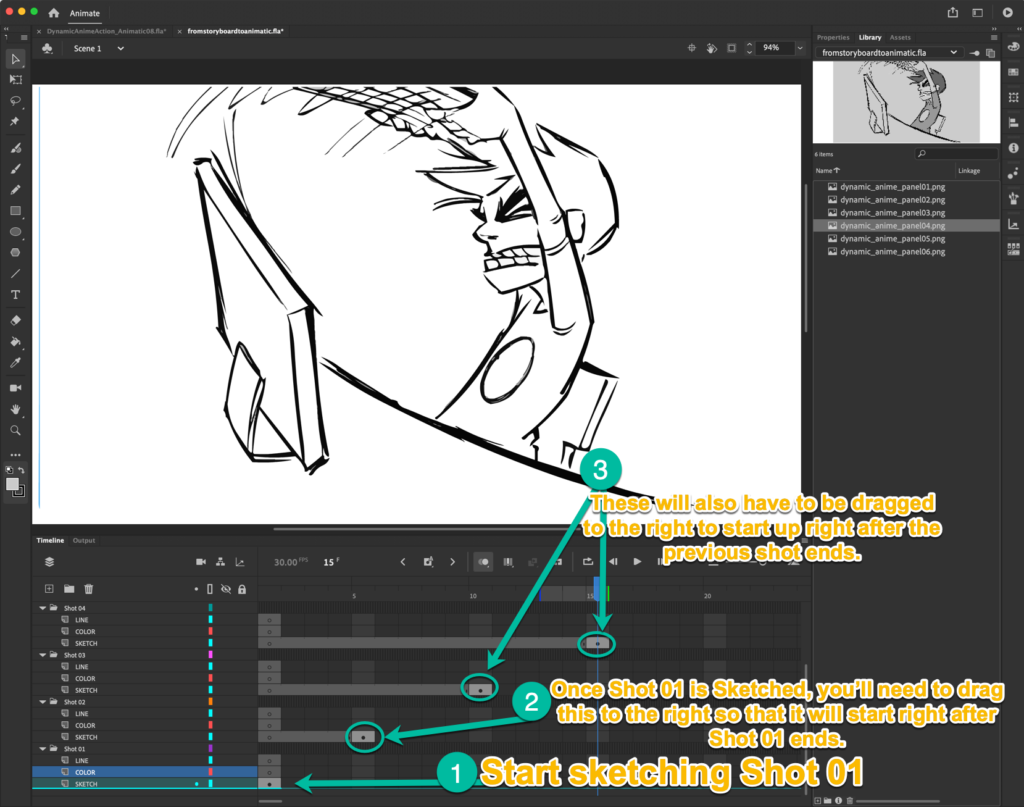
Use the skills you learned in the Bouncing Ball tutorials to complete the sketch of Shot 01. You may choose to work Pose to Pose or Straight On. (See the Difference.)
Drag the first frame of Shot 02 to the right so that it will start up on the first frame AFTER Shot 01 ends.
Then, add your Line Work.
And finally, your Color Layer.
SAMPLE Animation File
Study how this animator set up his file — click link to download his final file to see how he did it! Dynamic Anime Action – Animate CC File for Download
You can also watch his course in PluralSight that walks you through this animation project step-by-step:
Dynamic Anime Action 2D Animation Video Course on PluralSight